New in version 6.3
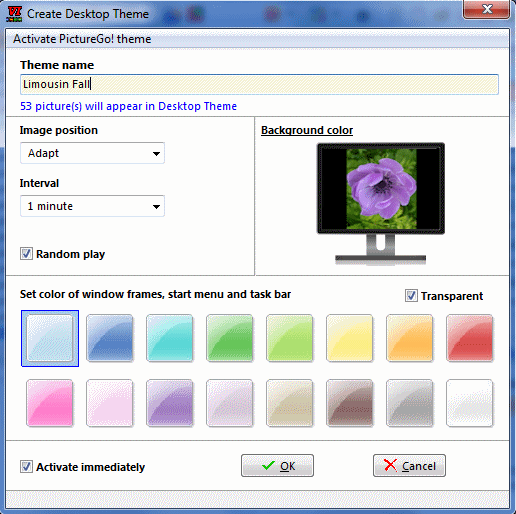
Create Desktop themes for Windows 7
Windows 7 comes with Desktop themes; basically a slide show on your desktop. Though Microsoft does supply you with a number of beautiful themes and regardless of the fact that you can download numerous themes from the internet, you can also use your own pictures as a Desktop theme.
In Windows 7, you can designate a folder to be your Desktop theme folder. Interesting fact is that when you add more pictures to that folder, those pictures will automatically appear in the Desktop theme. The downside is that you are limited to that one folder and that subfolders are not included in the theme.
These limitations are tackled in PictureGo! Just collect all your favorite pictures in a MyShow file and turn the MyShow file into a Windows 7 Desktop Theme file. A limitation of Windows 7 that could not be overcome is that all pictures in the theme have to be located on the same drive.
Picture fade out in slide show
Once described as the lacking feature, pictures will now fade out before a new picture is shown. This is an optional feature; it can be switched off in the new tab page Effects in the Options window. Also, the speed of fading can be set in the Effects tab page. By default, picture fade out will be switched on.
Zoom and crop
In the previous version Zoom mode (on the full image) was introduced. A new optional feature is Automatically switch to zoom mode after clicking on a thumbnail. This option, by default switched on, can be set in the tab page Full Screen in the Options window.
In Zoom mode, the image is now handled the same as the original. Whether you edit or rotate the picture, the same operations are carried out on the original picture. Though this must sound very logical, so far this was not the case since the image you look at in Zoom mode is physically a different image (it is basically a full crop of the original). Of course this does not go for crops you make yourself; i.e., rotating a cropped picture has no effect on the original image.
Once you crop a picture, a save button appears on the toolbar to put the cropped image into a file. Hovering over the save button will make a short menu appear with handy shortcuts where to save the picture.
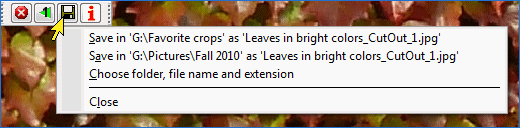
Save cropped image
Until this version, the Shift button had to be kept down when you wanted to crop according to a chosen aspect ratio. Without holding this key down, you would crop to whatever size (free crop). This ratio cropping could easily go wrong (lost aspect ratio when the Shift key was released) by a slight movement of the mouse. To solve this problem, the Ratio dropdown menu has been extended with a new item: Free (this is the default setting). If you want to crop according a certain aspect ratio, you first choose the desired Ratio on the dropdown menu. While drawing the rectangle to create the crop, you no longer have to hold the Shift key down.

Set crop ratio